Kubernetes
Prerequisite: An existing Kubernetes-Cluster with at least one Node, e.g. k3s, k8s or minikube (local development only). Our recommendation is k3s with a minimum of 2 worker nodes.
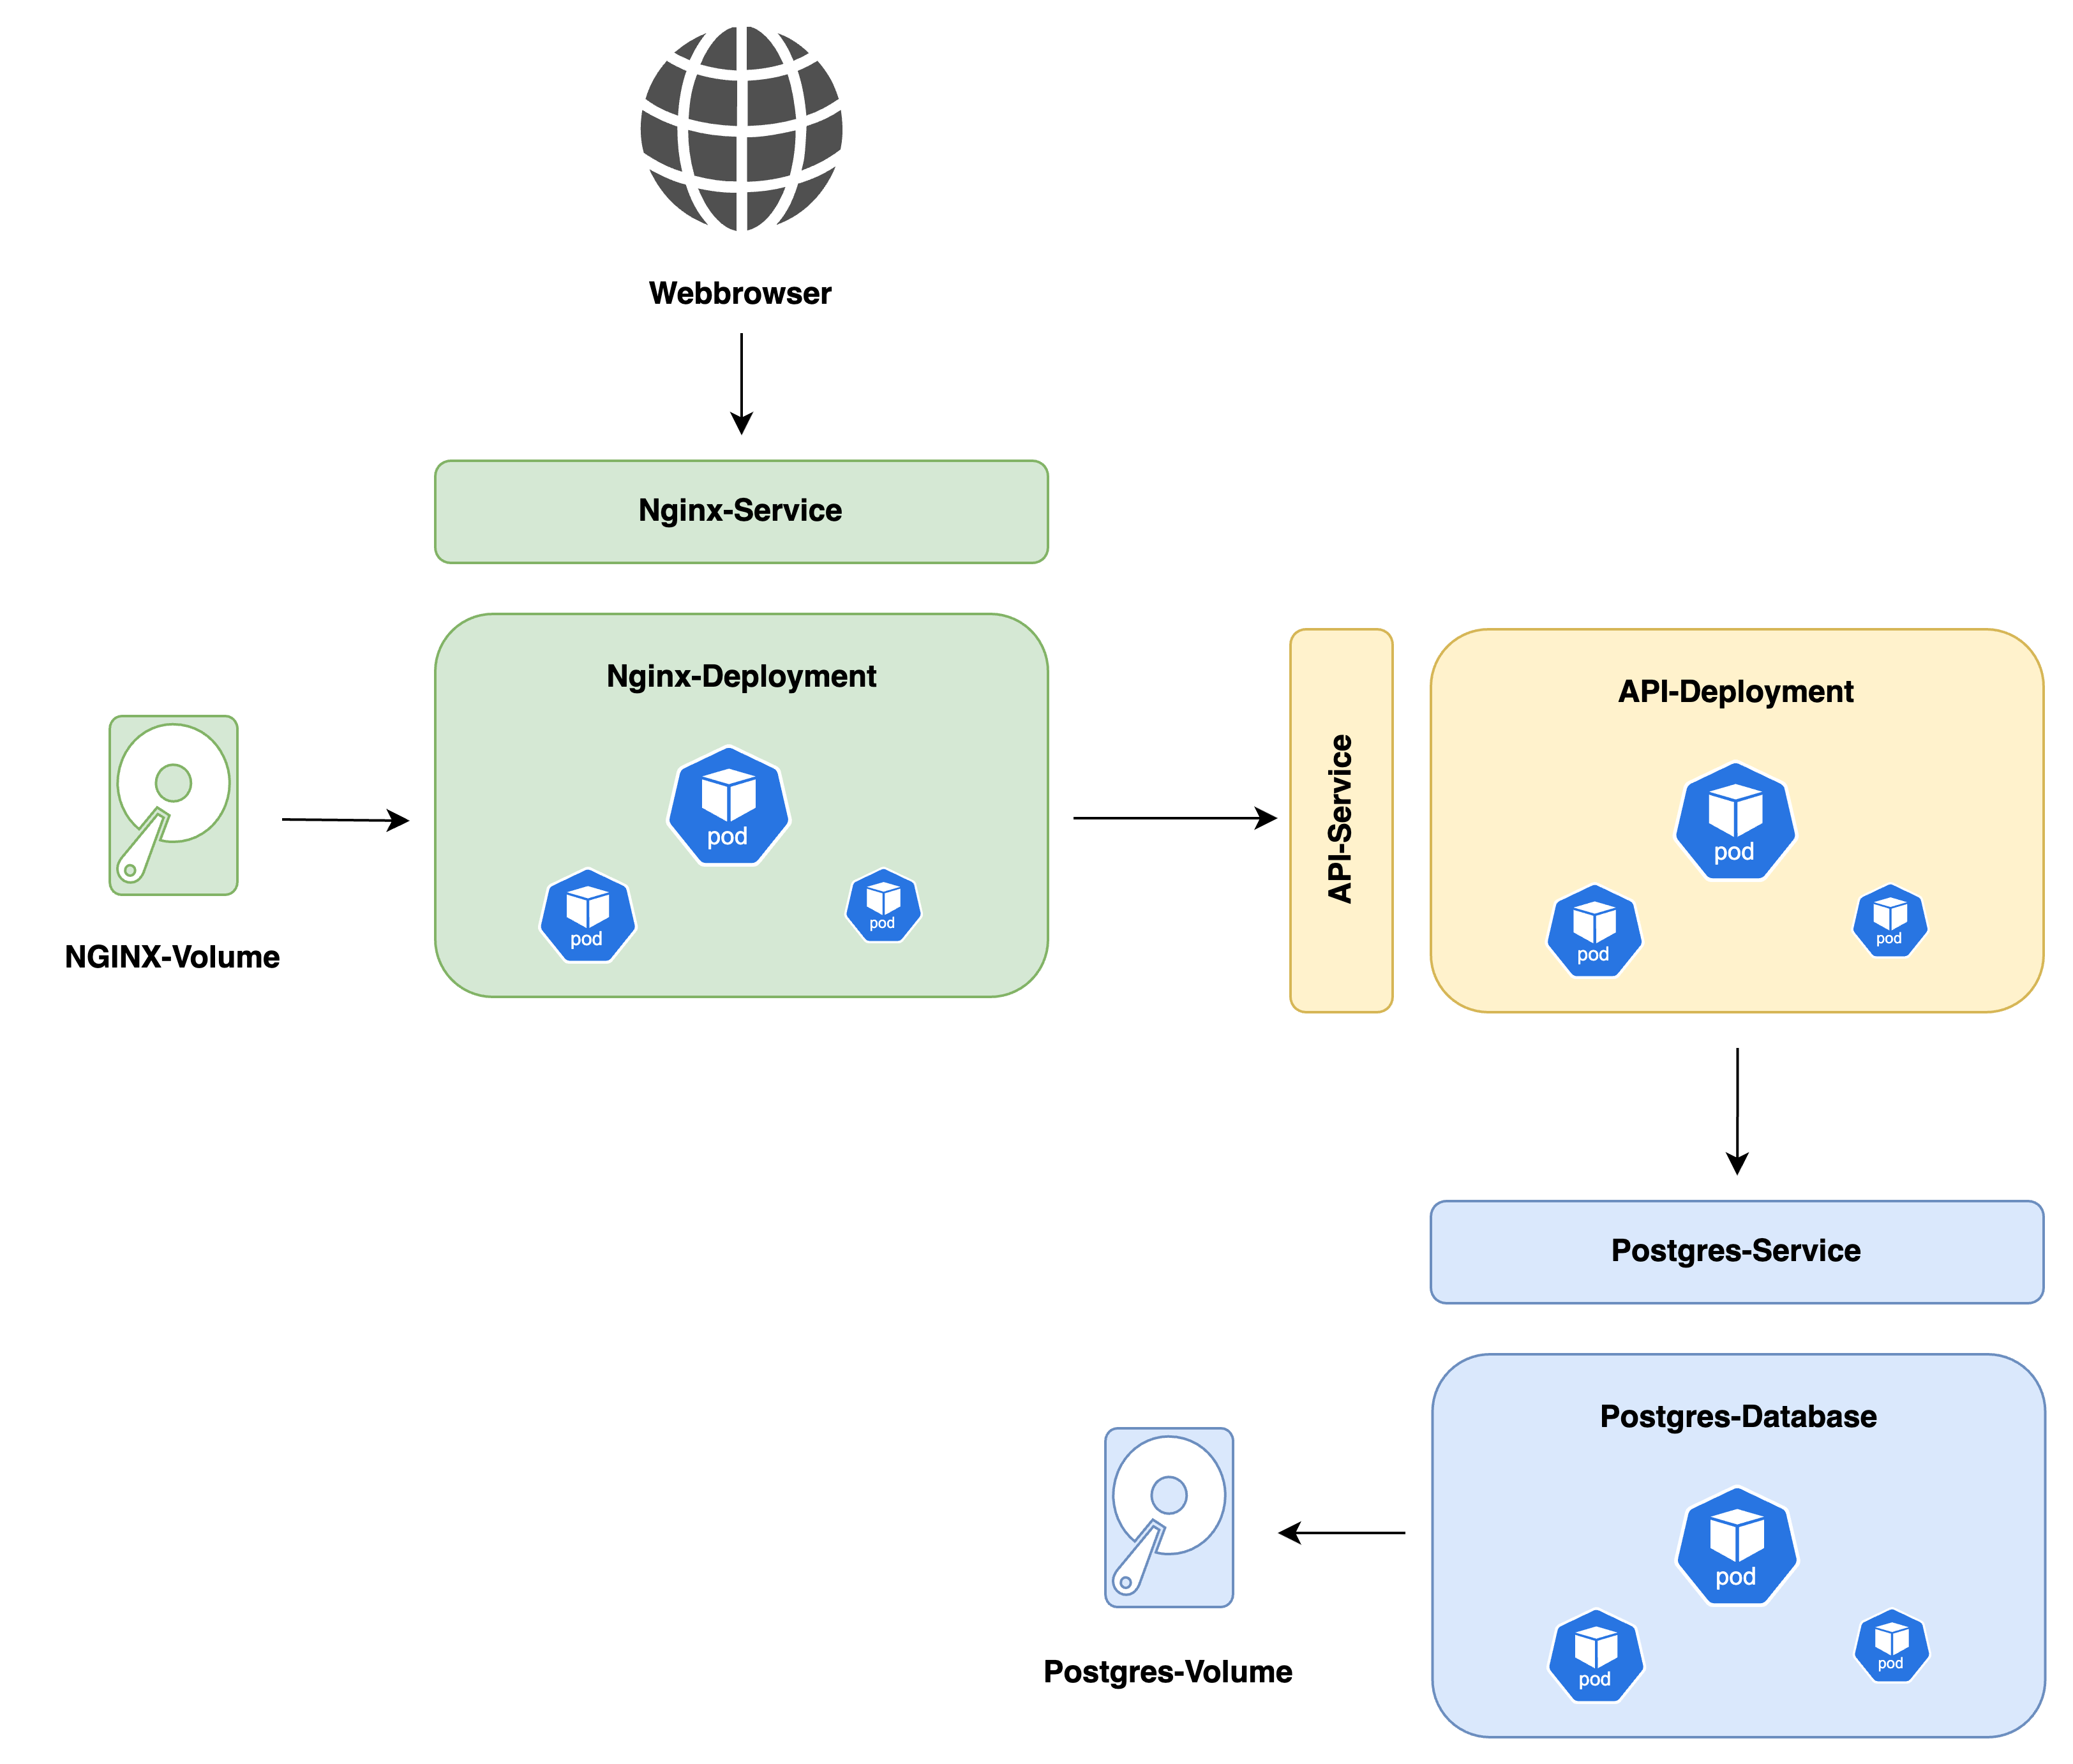
High-Level Data Flow
Configuration files
Download the template-files here. Copy all files from the kubernetes directory to an empty Git-Repository (for version control) like this:
└─── UC-API-KUBERNETES
    └─── app.yaml
    └─── nginx.yaml
    └─── psql.yaml
The YAML - files contain all infrastructure components you need to deploy on the cluster. Before you start with the deployment, read carefully through all files and change the placeholder-values that you need to change.
Sizing Requirements
The requested resources can only be estimated on a high level. Please keep an eye on your cluster to see the current usage of CPU, RAM and disk space. This repository also contains a k6-testrun-file you can use to trigger load- and performance-tests on your cluster. As a rule of thumb, you can use the following resources as minimum for the pods:
| Monthly Users | App | Database | Webserver |
|---|---|---|---|
| 0 - 300.000 | 2x Pods, each 2 vCPU 2 GiB RAM | 2x Pods, each 2 vCPU 2 GiB RAM, shared PV with 1 TiB storage | 2x Pods, each 2 vCPU 2 GiB RAM |
| 300.000 - 1.000.000 | 4x Pods, each 2 vCPU 2 GiB RAM | 4x Pods, each 2 vCPU 2 GiB RAM, shared PV with 2 TiB storage | 4x Pods, each 2 vCPU 2 GiB RAM |
| 1.000.000 - 2.000.000 | 8x Pods, each 2 vCPU 2 GiB RAM | 8x Pods, each 2 vCPU 2 GiB RAM, shared PV with 4 TiB storage | 8x Pods, each 2 vCPU 2 GiB RAM |
Installation
-
Install
kubectland connect to the Kubernetes-Cluster withkubectlaccording to this documentation -
Check the existing namespaces with
kubectl get namespaces. Create a new namespace withkubectl create namespace ucapi(or any other namespace name that is available) and make sure to adjust the namespace in allYAML- files accordingly -
In the next steps, you'll deploy the different components to the Cluster. Before you proceed, make sure that you have adjusted the
YAMLconfiguration files according to your needs and uploaded a repository secret to access the images. -
Start with the PostgreSQL-Database (you can skip this if you're using a database outside of the cluster). Create a secret that contains the credentials for the Postgres-DB. Make sure to use a secure password:
kubectl create secret -n ucapi \
        generic \
        postgres-secret \
        --from-literal=POSTGRES_DB=uc_db \
        --from-literal=POSTGRES_USER=ucapi \
        --from-literal=POSTGRES_PASSWORD=secret
-
Now deploy the database by running
kubectl apply -f psql.yaml -
Next, deploy the App by running
kubectl apply -f app.yaml -
Check if the pod(s) are running as expected:
kubectl get pods -n ucapi. Also verify the database status by checking the logs of the pods withkubectl logs POD_NAME -n ucapi. The App-Pod should send a "connection success" in the logs -
Next, deploy the NGINX reverse proxy with
kubectl apply -f nginx.yaml. Make sure that you have updated the configurations in the file before! -
Upload your static files in the
/var/www/directory of one of the NGINX-Pods -
Make sure to expose the NGINX-Service via an Ingress to the Internet, for example with NGINX Ingress Controller
-
You're done! Make sure to properly test to access all static files and to store consents!